The quick answer
To allocate freight and insurance on the same NetSuite inbound shipment, add a row for each category on Landed Cost. Set the allocation method and choose the shipment lines in Associated Items on each row. Save the shipment, receive the goods, then verify both amounts on the item receipt and in GL Impact.
Before you start
Enable Inbound Shipment Management and Landed Cost. Check that every intended shipment line is eligible and its item tracks landed cost. Confirm both categories and their posting accounts, your receiving and posting permissions, and the open posting period. The example uses average-cost, lot-numbered items, the same unit of measure on all lines, and matching US Dollar currencies at an exchange rate of 1.00.
The screenshots use fictional person and company names and example transaction values.
1. Build the shipment
Go to Transactions > Purchases > Create Inbound Shipment. In Items, select a PO, choose one of its eligible items, check Quantity Expected, and use Add Row. Repeat for the remaining lines. HM-314 and SP-682 appear on both purchase orders in this example, so check the PO number as well as the item.
PO846 has 5 Each available on its first line. Set Quantity Expected to 4 for this shipment, leaving 1 available. PO846 ships 4 Each of HM-314 and 2 of SP-682. PO852 ships 6 Each of HM-314, 8 of SP-682, and 4 of VV-529. The five lines add up to 24 Each.
2. Allocate the two charges
Open the Landed Cost subtab. Enter Freight for 432.00 and Insurance for 144.00 as two separate rows. Use US Dollar and Exchange Rate 1.00 in this matching-currency example, and check the Effective Date against your accounting policy.
For each row, set Allocation Method to Quantity, select all five intended lines in Associated Items, and choose Add Row. Save the shipment and reopen Landed Cost. Both amounts and both sets of line associations should still be there.
3. Receive the items and assign lots
Choose Mark In Transit, then Receive. Check the date, the open Posting Period, the receiving location and all five quantities. The example receives all 24 Each at Cedar Dock.
Open Inventory Detail for each line. If your setup offers Autogenerate Numbers, check the prefix, minimum digits and starting number. On the first line, the walkthrough generates one lot number, ND-041, and assigns all four units to it. If a line contains more than one lot, enter the quantity for each lot and confirm the assignments add up to the receipt quantity.
Choose OK on each detail window. Use Save to submit receiving in this example. If your form presents a separate Submit or Process action, complete it. Refresh Process Status and open Processed Records after the submission is Complete. The five shipment lines succeeded and the links resolve to two item receipts in this example.
4. Verify the receipt postings
Open IR9371, the receipt for PO846. Open Landed Cost on the four-unit HM-314 line. The line shows 72.00 for Freight and 24.00 for Insurance, totaling 96.00. The allocation works out to 432 ÷ 24 = 18.00 freight per unit and 144 ÷ 24 = 6.00 insurance per unit.
On receipt IR9372 for PO852, open GL Impact. Match the Freight and Insurance posting rows to their inventory debits and offset credits. In this example, the six-unit HM-314 line shows 108.00 freight and 36.00 insurance. The memo text, accounts, and posting presentation depend on the item, category, subsidiary, and costing setup.
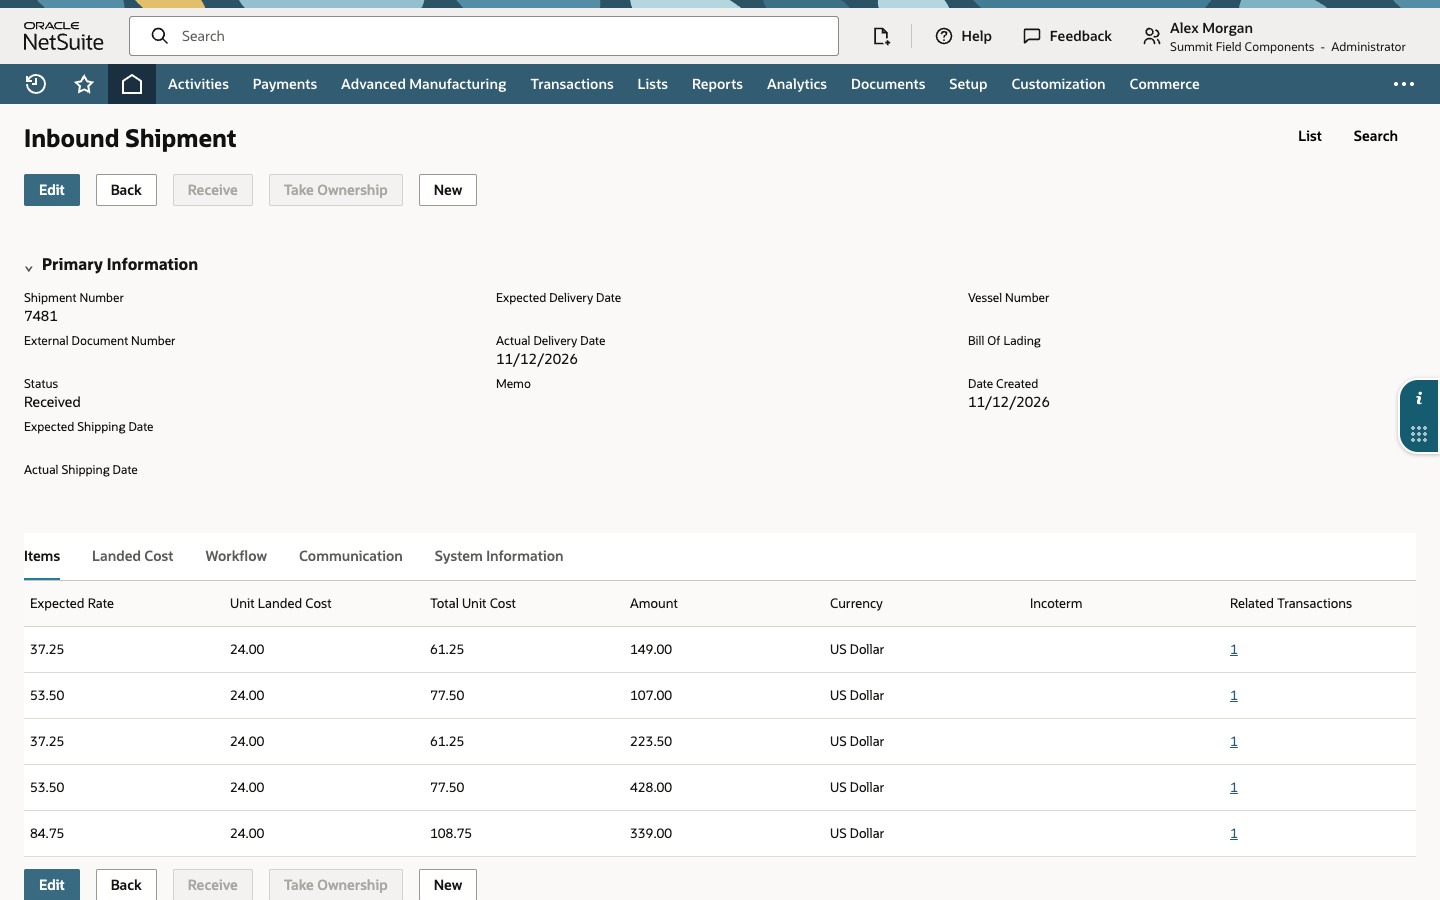
Return to the inbound shipment and confirm Received. Open the number in Related Transactions on the first line to trace the four units to IR9371. Unit Landed Cost shows 24.00 on each of the five lines. That adds 24.00 per Each to the purchase cost in this example.
Common questions
Can freight and insurance use different shipment lines?
Yes. Set Associated Items separately on each cost row. Quantity allocation uses the eligible quantities from the lines selected for that row.
Does saving the charge mean it has posted to inventory?
Saving stores the charge and its scope on the shipment. Follow the completed receiving submission to the item receipt, then review the receipt line’s landed-cost detail and GL Impact to see what posted.
Does NetSuite always create one item receipt per purchase order?
Follow the actual receipt links in Processed Records or Related Transactions. The example creates two receipts from two orders. Grouping depends on the receiving context.
What should I check if the receipt amount differs?
Review the selected shipment lines, quantities, units, effective date, currency and exchange rate, item eligibility, and category accounts. For a partial receipt, compare the result with the quantity actually received and check for rounding differences.