The quick answer
In the RF-SMART app, open Transfer Order Receiving, select Load Transfer Orders and choose the order. Every line starts red. Scan an item, then select Complete to receive the whole line, or type a quantity and press Enter to receive part of it. A partly received line turns yellow, a finished line turns green and moves to the end of the list, and you can come back to a yellow line as often as you need. When every line is green, Submit sends the quantities to NetSuite. RF-SMART is a partner SuiteApp, so check the item receipt and the transfer order's Received column in NetSuite afterwards.
This guide describes one RF-SMART transfer order receiving workflow. The menus, colors, button labels and posting behavior belong to the partner app and its configuration. NetSuite itself records an item receipt against the fulfilled transfer order. The screenshots show sample data. Person and operating-company names are fictional. Use your own records and values when following the steps.
Before you start
You need the RF-SMART SuiteApp with its Transfer Order Receiving role, and permission to receive transfer orders. The transfer order must be approved if your account requires approval, fulfilled and shipped from the source location, and still open at the location you are receiving at. The receipt date cannot be earlier than the shipment. If your account uses Use Item Cost as Transfer Cost, NetSuite can require each receipt to match a specific item fulfillment, which can stop one fulfillment from being split across several receipts. Menu names, columns, colors and the Complete button are what this RF-SMART version shows, so yours can differ.
Bins, lot numbers, serial numbers and inventory status can add prompts or required entries, and a staging bin can leave the stock waiting for a putaway. This example uses plain stocked items without any of them.
01. Check the transfer order in NetSuite
Open transfer order TO52 from Reno Distribution to Spokane : Valley Store. It is Pending Receipt. On the Items subtab, PL-120 shows 4, BN-305 shows 2 and TR-210 shows 5, and every line is fulfilled.
Scroll right to the Received column. It reads 0 on every line, so nothing has been received yet.
02. Open the receiving role and choose the order
On the RF-SMART main menu, scroll to Transfer Order Receiving and select it. Select Load Transfer Orders. The list shows the open transfer orders with TO #, From Location and To Location. Choose 52, from Reno Distribution to Spokane : Valley Store.
03. Review the lines before receiving
The receiving screen shows To Location: Spokane : Valley Store and one row for each line. All three are red, because none has been processed. PL-120 has Remain 4, BN-305 has Remain 2 and TR-210 has Remain 5, with Rec'd 0 on each.
04. Receive PL-120 in full
In Item, scan or type PL-120 and press Enter. The item screen shows Remain 4, Rec'd 0 and UOM EA. Select Complete (4). In this screen the number on the button is the line's ordered quantity, and Complete receives what is left of the line. Check Remain before you select it.
PL-120 turns green with Remain 0 and Rec'd 4, and it moves below the other two lines.
05. Receive part of TR-210
Scan or type TR-210, enter a quantity of 2 and press Enter. The line turns yellow with Remain 3 and Rec'd 2, and it sits above the green line. A yellow line is partly received. You can leave it and come back, for example when the truck has more of that item further back.
06. Receive BN-305 and finish TR-210
Scan BN-305, enter 2 and press Enter. BN-305 turns green. Then scan TR-210 again and select Complete (5). The 3 that are left are received, so TR-210 shows Rec'd 5, as in the demonstration. The order you take the cartons in does not matter, because each line keeps its own Remain and Rec'd.
07. Check the list before submitting
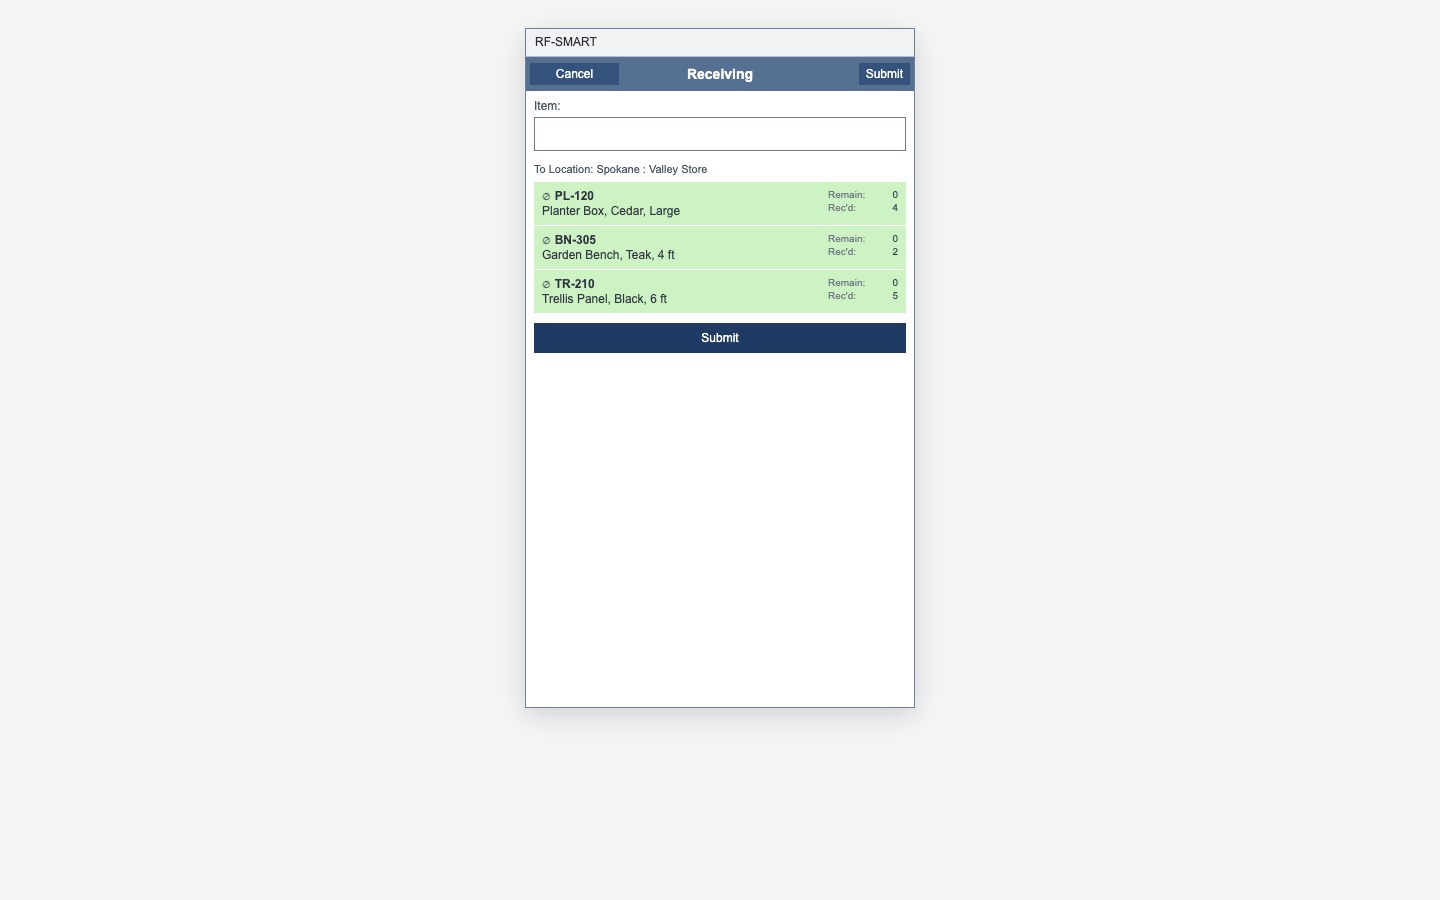
PL-120, BN-305 and TR-210 are green with Remain 0 and Rec'd 4, 2 and 5. Submit is available at the bottom of the list, and also in the header.
Check the result
- The list shows PL-120, BN-305 and TR-210 in green with Rec'd 4, 2 and 5.
- No line is red or yellow, and Remain is 0 on every line.
- After you submit, open TO52 in NetSuite and check its Received column and the related item receipt.
Common questions
What do the red, yellow and green lines mean?
Red means the line has not been processed, yellow means it is partly received and green means it is fully received. A finished line moves to the end of the list, so the lines that still need work stay at the top.
Can I receive a line in several passes?
Usually yes, if your RF-SMART setup and NetSuite transfer-cost rules allow partial receipts. Enter the quantity you have, press Enter, and open the same line again later. Remain and Rec'd add up to the ordered quantity, so TR-210 goes from Remain 5 to Remain 3 after the first pass and to 0 after Complete. If your account requires each receipt to match a whole item fulfillment, receive that fulfillment in one pass instead.
What does Complete (5) do when only 3 are left?
It should receive only the open quantity, here the 3 that are left. The number on the button is the ordered quantity in this screen, not the quantity that is left, so check Remain on the item screen first. Other RF-SMART versions can label the button differently.
Does Submit create an item receipt?
When RF-SMART is set to post receipts automatically, Submit creates an item receipt against the transfer order for the quantities entered, which adds the stock to the receiving location. In a setup that defers or queues posting, Submit can record the work first and the receipt appears later. A handheld confirmation does not prove that a receipt posted, so open the transfer order and its related records after you submit.
Can I receive more than the order says?
Not through the normal transfer order receipt. NetSuite generally prevents receiving more than the unreceived quantity that was fulfilled. If an unexpected carton arrives, set it aside and correct the fulfillment or handle the excess through your inventory procedures.